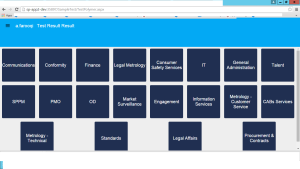
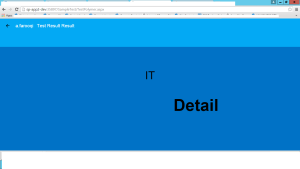
In this blog I am going to merge Polymer Template through Angular JS Framework with SharePoint List. I am new to polymer and as well as on angular js but it is pretty much cool ready made stuff :).
You just need to have some knowledge of SharePoint to complete this simple example. I have shared the source code below just upload to SharePoint Library (Add one List Area) and run the page.
For More Knowledge (Polymer)
For More Knowledge (Angular)
For More Knowledge (SharePoint CSOM)
In this demo I will use the below Polymer template. Polymer elements are based on the set of htmls files libraries which are need to be import on the page. On the back end polyer html pages used the JS and CSS. There is a folder of libraries which we need to put in our root folder. When I tried to copy the Libraries folder in my sharepoint desiger page it block due to jason files. Actually JSON files are objects of array for tutorial of polymer, In our databinding we dont need any hard coded JSON files.
We Just create a Single Folder in my site .
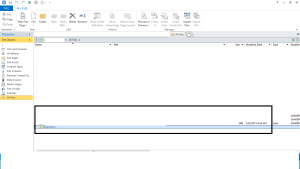
Create a Single aspx Page, in which we will add our Angulr JS, SharPoint JS Api’s and design it using Polymer core elements. I name it as TestPolymer.aspx
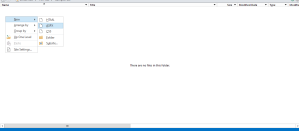
I removed all the json files because SPD dont allow to copy the JSON files, These jason files are used in as a data source in the polymer template. So now we copy and paste that libraries inside our SampleTest Folder which we created above. We will create another JS file for angular and we named it as app.js.(we will put our module, controller inside).
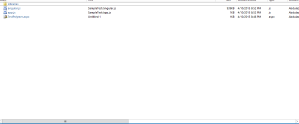
WE will also copy the angular.js file to work with the angular framework. So far our folder will be look like .
- Import Polymer libraries on our page. Libraries folder I mentioned above and shared in the OneDrive to just copy and paste in the aspx page folder.
- Import all the Polyer Script, jquery file, angular.js file and I add CSS for our views.
<!–importing the anguar Script and the Libraries of the Polyer –>
<!–Start –>
http://./Libraries/webcomponentsjs/webcomponents.js/
http://./Libraries/webcomponentsjs/jquery-1.9.1.js
/_layouts/15/init.js
http://./Libraries/webcomponentsjs/MicrosoftAjax.js
<link href=”./Libraries/core-toolbar/core-toolbar.html” rel=”import” />
<link rel=”import” href=”./Libraries/core-header-panel/core-header-panel.html” />
<link href=”./Libraries/core-icon/core-icon.html” rel=”import” />
<link rel=”import” href=”./Libraries/paper-icon-button/paper-icon-button.html” />
<link href=”./Libraries/core-icon-button/core-icon-button.html” rel=”import” />
<link rel=”import” href=”./Libraries/paper-tabs/paper-tab.html” />
<link rel=”stylesheet” href=”./Libraries/core-animated-pages/core-animated-pages.css” />
<link rel=”import” href=”./Libraries/core-animated-pages/core-animated-pages.html” />
<link href=”./Libraries/polymer/polymer.html” rel=”import” />
<!–Polyer Import End –>
<!– SharePoint Libraries –>
/_layouts/15/sp.core.js
/_layouts/15/sp.runtime.js
/_layouts/15/sp.js
/_layouts/15/core.js
<!– angular js –>
http://./angular.js
<!– our js file for declaring controller and directive –>
http://app.js
Add the html part of the body.
<body fullbleed vertical layout unresolved> <!– use fullbleed attribute to specify the body should fill the viewport –>
<template is=”auto-binding” ng-controller=”SampleTestController”> <!– This is our Template which will repeate its child , I also attached this with my Controller Defined in app.js file–>
<core-toolbar class=”medium-tall”> <!–This is our toolbar for header–>
<core-icon-button icon=”{{$.pages.selected != 0 ? ‘arrow-back’ : ‘menu’}}” on-tap=”{{back}}”></core-icon-button> <!–This icon button will call funciton on tap or on click–>
<span id=”axix” style=”color:white”> You Name</span><!– Simply for header–>
<core-icon-button on-tap=”{{backs}}”><img src=”http://dev:35897/myiner/logo.png” /></core-icon-button><!–you can put any logo here for your company as i did–>
</core-toolbar> <!–toobar ends–>
<!– core element of Polyer which will show the boxes on the page–>
<!– I will fetch data from SharPEoint and put in Array name items and pass this array to the template inside–>
<core-animated-pages id=”pages” flex selected=”0″ on-core-animated-pages-transition-end=”{{transitionend}}” transitions=”cross-fade-all hero-transition”>
<section vertical layout>
</template>
</div>
</div>
</section>
<template repeat=”{{item in items}}”>
<section vertical layout>
{{item.name}}
Interviewer Detail
</section>
</template>
</core-animated-pages>
</template>
</body>
Now the Javascript Part.
‘use strict’;
var currentUser;
var serverUrl = “http://siteurl/”;
var taskListItem = ”;
var collListItem = ”;
var items = [];
var itemsx = [];
//I m using the Jquery on ready function to load the SharEOoint List and add them in the array.
//Two function to load user and to get data from list.
//we can also create a controller or module dependency in the anguar and load them first
$(document).ready(function () {
ExecuteOrDelayUntilScriptLoaded(getuser, “sp.js”);
ExecuteOrDelayUntilScriptLoaded(loadlist, “sp.js”);
});
//This is my Load List and Add them in Array itemx.
function loadlist() {
console.log(“load me first”);
var context = new SP.ClientContext(“http://dev:35897”);
var web = context.get_web();
var myList = web.get_lists().getByTitle(“Area”);
var camlQuery = new SP.CamlQuery();
camlQuery.set_viewXml(‘<View><Query><Where><Gt><FieldRef Name=”ID”/><Value Type=”Counter”>1</Value></Gt></Where></Query><ViewFields><FieldRef Name=”Title” /></ViewFields></View>”‘);
collListItem = myList.getItems(camlQuery);
context.load(collListItem);
context.executeQueryAsync(getInterviewSuccessfully, “failer”);
}
function getInterviewSuccessfully(sender, args) {
var listItemInfo = ”;
var listItemEnumerator = collListItem.getEnumerator();
var str = ”;
var strg = ”;
var count = 0;
while (listItemEnumerator.moveNext()) {
var oListItem = listItemEnumerator.get_current();
count++;
items.push({
name: oListItem.get_item(‘Title’),
snippet: oListItem.get_item(‘Title’),
age: oListItem.get_item(‘ID’),
});
}
//console.log(items);
}
//This is my function to loa user.
function getuser() {
var context = new SP.ClientContext(serverUrl);
var web = context.get_web();
currentUser = web.get_currentUser();
context.load(currentUser);
context.executeQueryAsync( //submit query to the server
function () {
$(“#axix”).text(currentUser.get_loginName().split(“\\”)[1]);
},
function (sender, args) {
alert(‘Request failed. \nError: ‘ + args.get_message() + ‘\nStackTrace: ‘ + args.get_stackTrace());
}
);
}
//Angular Part.
//Defining the module
var SampleTestApp = angular.module(‘SampleTestAppModule’, []);
SampleTestApp.controller(‘SampleTestController’, function ($scope, $http) {
$scope.itemsx = [];
$scope.FillAreas = function () {
var context = new SP.ClientContext(“http://dev:35897”);
var web = context.get_web();
var myList = web.get_lists().getByTitle(“Area”);
var camlQuery = new SP.CamlQuery();
camlQuery.set_viewXml(‘<View><Query><Where><Gt><FieldRef Name=”ID”/><Value Type=”Counter”>1</Value></Gt></Where></Query><ViewFields><FieldRef Name=”Title” /></ViewFields></View>”‘);
collListItem = myList.getItems(camlQuery);
context.load(collListItem);
context.executeQueryAsync($scope.getInterviewSuccessfully, “failer”);
}
$scope.getInterviewSuccessfully = function (sender, args) {
var listItemInfo = ”;
var listItemEnumerator = collListItem.getEnumerator();
var str = ”;
var strg = ”;
var count = 0;
while (listItemEnumerator.moveNext()) {
var oListItem = listItemEnumerator.get_current();
count++;
$scope.itemsx.push({
name: oListItem.get_item(‘Title’),
snippet: oListItem.get_item(‘Title’),
age: count,
});
}
console.log($scope.itemsx)
}
function errorHandlerArea(sender, args) {
alert(‘Request failed111. ‘ + args.get_message());
}
$scope.FillAreas2 = function () {
addEventListener(‘template-bound’, function (e) {
var scope = e.target;
scope.items = items;//axix();
scope.selectView = function (e) {
var i = e.target.templateInstance.model.item.age;
this.$.pages.selected = i + 1;
}
scope.back = function () {
this.lastSelected = this.$.pages.selected;
console.log(this.lastSelected);
this.$.pages.selected = 0;
}
scope.transitionend = function () {
if (this.lastSelected) {
this.lastSelected = null;
}
}
});
}
$scope.FillAreas2();
});
//Simple function which defined the jason object to deubg.
function axix() {
var x = [
{
‘name’: ‘Nexus S’,
‘snippet’: ‘Fast just got faster with Nexus S.’,
‘age’: 1
},
{
‘name’: ‘Motorola XOOM™ with Wi-Fi’,
‘snippet’: ‘The Next, Next Generation tablet.’,
‘age’: 2
},
{
‘name’: ‘Motorola XOOM™ with Wi-Fi’,
‘snippet’: ‘The Next, Next Generation tablet.’,
‘age’: 4
},
];
//console.log(x);
return x;
}
&nsp;
Below is the source code all, You actually it is an stp file. How to use it.
- Upload it on the list template library.
- Create an instance of this.
- Go to the SharePoint designer open the content and browse or directly browse it form url of your library.
Souce Code
https://www.dropbox.com/sh/bjm59umlh2kmjqk/AADIvDxGi5GvUBXmP8FkOqJ7a?dl=0

